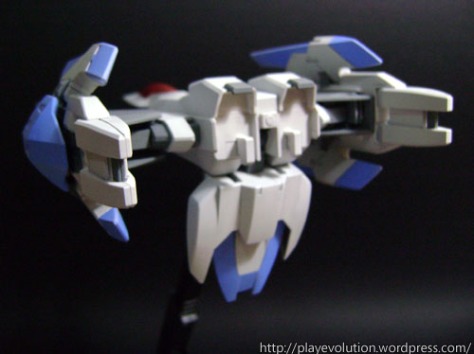
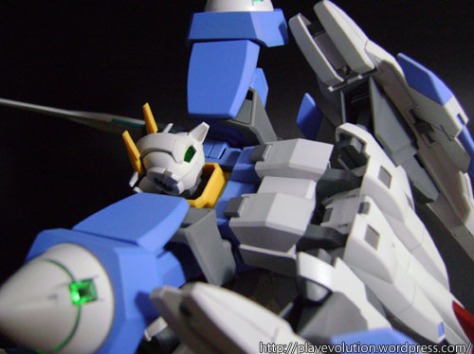
The O Raiser and 00 Gundam combine to form the 00 Raiser. Took some time posing the completed model in various poses and I can never make enough dramatic poses to snap.


Front and rear views.
For the 1/100 model, the small polycaps holding the Twin Drive arms bear the entire weight of the O Raiser binders and cannot be placed in dramatic poses for long periods of time. The shoulder joints also suffer from this problem due to poor engineering and can only hold static standing poses.

Getting the O Raiser into docking mode involves pulling out the rear section to allow the main nozzle flap to bend forward.

The fuselage bends downward so it hangs off the back of the 00 Gundam.

The joint slides downwards on the back of the 00, with the two gray squares at the top functioning as hooks to keep it in place.

A close-up view.

Action.


00 lazer.

Oops, face blocked.


I bought the black background last weekend but it seems a little too small for this particular model. Included thumbnails on the reviews page to make viewing more friendly.

How the hell did you manage to do that poses??? the binders of my 00 raiser fell from the drives the moment put them, even pointing at the floor…. I don’t want to glue them, so I left them attached to the raiser instead…
The joints on mine sag really easily too. The joint design on the 00 Gundam is not designed to take on so much weight so I guess it can be fixed with a little super glue applied at the joints to tighten them. Did you slide the binders forward after attaching them to the drives? There’s a catch on the joint from the binders so they should be dead centre when viewed from the front of the drives, preventing them from simply dropping out.
yeap….. there’s a catch there alright…btw, what paint do you use to paint the GN Sword II ‘s transparent part?
I used Mr. Color Clear Blue. Any clear colour works, but hand-painting it is extremely difficult as I only managed to get one of the two parts to look perfectly even after countless tries. It is much easier to get an evenly-coloured clear part by spraying.
How did you paint or colored the green circle areas next to his knee and elbows? They were clear for me.
They were painted clear green on the front side and silver on the back side. There are several other ways to achieve different effects.
You may paint the part underneath black and leave the parts in clear green for a darker hue. This way is preferred if you happen to use decals with the circular line and tiny print in the middle (like the 1/60 Exia did) so you can apply them over the black layer.
Or, you could try sticking hologram stickers (the sparkly green kind) and attach the clear parts over them to get them sparkly.
Hello, does it really have weak joints?
How about the designer color? Is it same?
Generally, the model is fine except for the Twin Drive joints which have to carry a lot of weight from the O Raiser wings. This is not so in the 1/144 HG version as it is much lighter.
I strongly believe that because there are no changes to the kit design, the Designer Color Version will face the same problem.
I have a huge a question that has been bugging me. I want to know what color is the blue used for the designer color version?? Im afraid the paint sprays might not have the color, so please suggest a paint to use, or paint mixing ratio.
I would like to know the paint ratio for the blue too as well.
hey a tip on hold the raiser wings is to put very small pieces of paper under the joint before putting it in located in the GN drive I believe (at least it is for the (1/100). This worked well for me, I can easily make poses and the raiser part will not fall off, even the godly angel pose where he used the Trans-Am Burst.
Based on the manual of the Designer’s Color version, it’s Cobalt Blue 70%, White 25%, Neutral Gray 5%, Purple (a little bit).
Are you referring to the polycap that holds the GN Drive cone? That makes sense if you want to tighten the joint there so that the wings can rotate instead of pointing just vertically.
I was referring to the sagging shoulder joints which I believe the other S2 Gundams don’t have (because my Cherudim doesn’t have that problem). Recently I found a fix for it which was to wedge a small 2mm-thick plastic piece inside the gap between the body and shoulder joint. It forces the joint to be in a fixed position, but it won’t sag and I can rest the gray arms of the GN Drive cones on the shoulders.