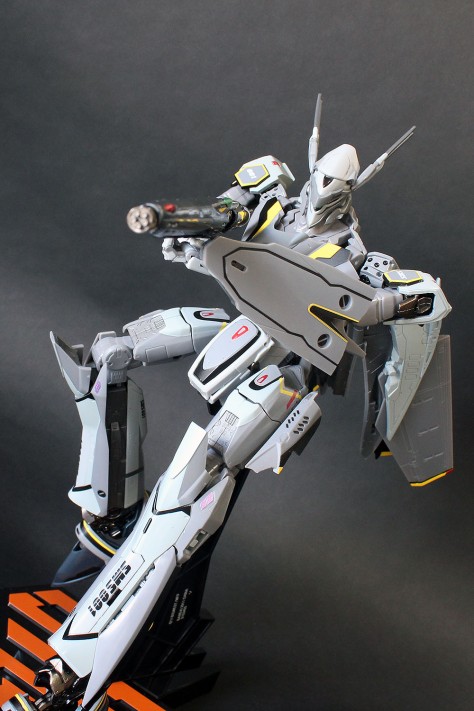
Thanks to my topsy-turvy life this month I didn’t have time to settle down and take pictures of my acquired holy grail last week. It’s quite a long story though, maybe I’ll leave it for the end of the post or something.
This time round I managed to squeeze out enough time during my rest. My new room doesn’t really have much table space so I had to move a lot of stuff away just to set up the background. I only have enough natural light in the morning, and the rest of the time I had to rely on a tripod instead.
As this is mostly a recolour of the VF-25F which I reviewed earlier, I’ll skip on a lot of things and jump straight to pictures.
Packaging in the same style. You also get the SMS-painted stand.
Fighter mode
Painted in the same style as the badass Roy Focker, while the primary colour is a more realistic gray.
The gunpod is in a nice gunmetal colour unlike the gaudy purple on the 25F.
Clear purple parts for the canopy.
It also comes with a figure of Ranka for the second seat behind.
Unfortunately on my figure the nose is a little misaligned and there’s a noticeable gap. It also causes problems keeping the landing gear doors flush when shut.
Also one of the shoulder pieces on my copy is slightly misaligned causing large gaps as seen here.
Badass skull marking on the back.
Gerwalk mode
Nothing much to say; it’s probably one of the better-looking Valkyries in this mode.
Battroid mode
The tolerances for this figure seem to have been reduced as it is much tighter all around. It was tough to get the fuselage to bend downwards and the head to stick out and form the collar area. I’ve seemed to have folded the area a bit excessively though. The swinging shoulder block (the thing with the five dots) is literally pointing up now.
The head lasers also come in hard plastic which I didn’t use for fear of breaking them.
The 25F has a nondescript visor while this guy has three eyes painted underneath its visor and a forehead sensor in clear red.
As you can see I’ve folded the back flap too far. The joints are really tight so there isn’t any good indication how far back is good enough.
Extra hands which I don’t use. They’re the same set as the 25F.
He looks especially badass wielding a maylay weapon.
Most of the stuff was covered in my 25F review, so I’ll only highlight a few differences. This release seems to have increased tightness, though the diecast joints will weaken after some play. It’s a pity my copy is a little gappy in some places.
★★★★☆
Last week I flew from Fukuoka to Tokyo just so I could take the JLPT in Chiba. For some reason my company suddenly wanted me to take it back in September. I initially thought of going at my own pace since they never fulfilled their promise of providing Japanese lessons, until I was good enough to sit for the N1 level, but seeing as it was a free opportunity I settled for N2 instead and had to quickly try to study during my free time although I didn’t achieve much. In October I was thrown across Japan to Fukuoka, and even though the test location cannot be changed for any reason, my company was willing to fork out money and send me back rather than just skip the test and take the next one in June.


